Ich habe Dr. Alban “Look Who's Talking” horen. Ich denke es ist ein gutes Lied. Er murmelt in
das Lied. Ich möchte die Texte verstehen. Ich suchte und las die Texte. Die Texte waren einfach, daß sie mich beeindruckten. Ich
erinnerte mich, im Radio in Jacksonville erklärte die Show, ein Mann
sei angeblich Arzt. Aber er hat Leute betrogen. Es ist illegal, als
Arzt angerufen zu werden, wenn Sie kein Arzt sind. Der Gastgeber
sagte, kann Arzt als Dr. Alban der DJ verwendet werden.
Alban Nwapa kommt aus Nigeria. Er ging
nach Schweden, um Zahnmedizin zu studieren. Um die Schulkosten zu
decken, war er ein DJ. Er hat in den Platten gesungen. Er beendete
die Schule und eröffnete eine Zahnheilkunde. Er hat den DJ behalten,
da er gut bezahlt hat. Unbekannt für das Radio, der DJ Dr. Alban ist
ein echter Arzt. Er war ein bekannter Musiker in Deutschland.
Danke fürs Lesen. Poste, wenn du
willst. Ich wüsche ihnen einen wunderbaren Tag!
------------------------------
I must practice German, to learn
German.
I heard “Look Who's Talking” by
Dr. Alban. I thought that is a good song. He mumbles in the song. I
wanted to understand the lyrics. I searched and read the lyrics. The
lyrics were simple and they impressed me. I remembered on the radio
in Jacksonville the show said a man was supposed to be a doctor. But
he scammed people. It is illegal be called a doctor when you are not
a doctor. The host said can you be called a doctor as in Dr. Alban.
Alban Nwapa is from Nigeria. He went to
Sweden to study dentistry. To pay for school, he was a DJ. Er sang in
his records. Er finished school and opened a dentistry. He kept the
DJ as it paid well. Unknown to the radio, DJ Dr. Alban is a real
doctor. He was a popular musician in Germany.
Thanks for reading. Post if you want.
Have a Great day!
Video Production - Creating Video For YouTube
Start 7/8/2019. Finished 9/13/2019.
To make videos to post on YouTube, I utilized the following:
-iPhone
-Blender
-GIMP
Making a Video:
The first step was to take video with my iPhone. Then I downloaded the video clip onto my computer.
I downloaded and installed Blender. Blender is a free, open source utility. To learn Blender I used the following tutorial videos from YouTube for Initial use, Adding Text, and Exporting the File. Adding text required the use of GIMP. GIMP is a free, open source utility.
On the iPhone, go to Settings, scroll down to Camera, select Record Video, and you can select and see the video resolution and frames per second (fps). The default for my phone was 1080 at 30 fps.
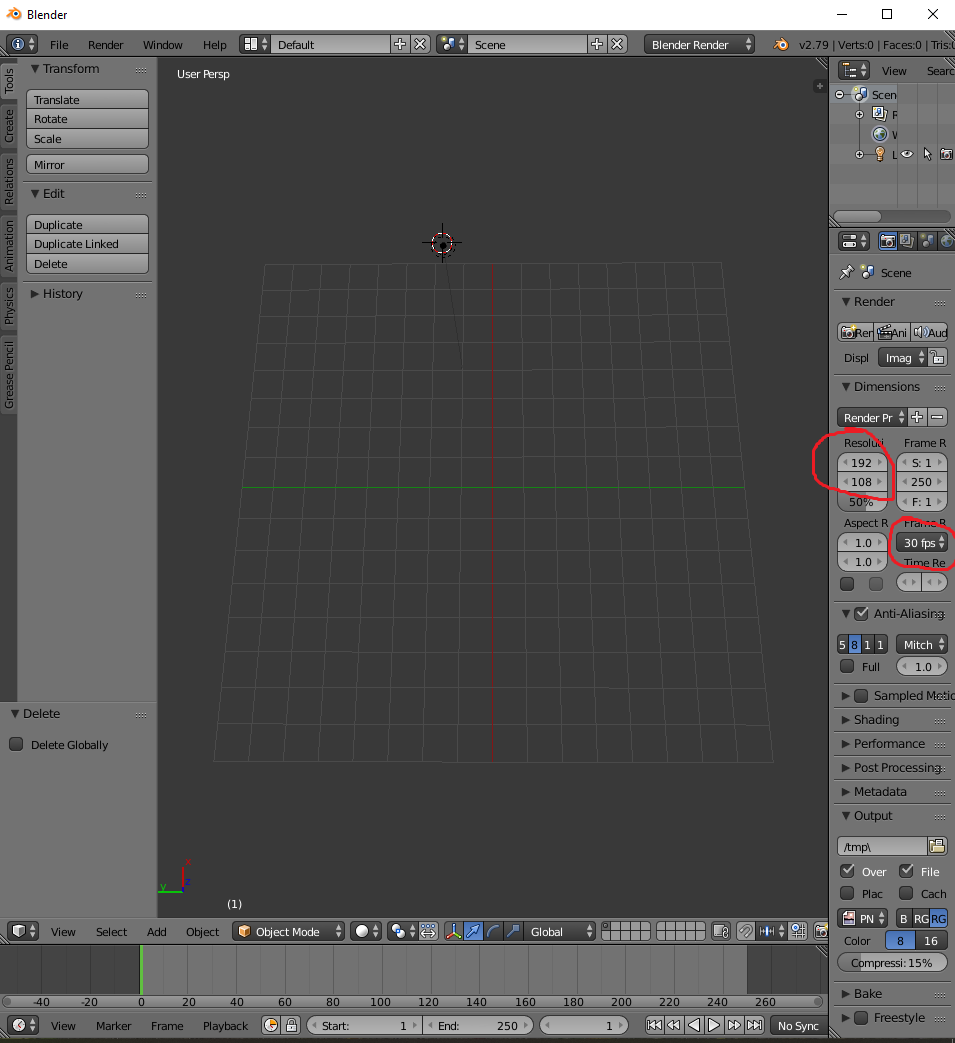
I opened Blender then deleted the items on the grid by selecting them, then pressing the delete key, followed by selecting the delete option. I then confirm the 1080p and 30 fps in the settings to the right. Note, 1920p seems to be the selection with 1080p.
At the top of the screen I select the Screen Layout icon and choose Video Editing.
From a recent trip, I filmed clouds when flying by hurricane Dorian from the window of an airplane. From my file folder, I dragged the video file into a section of blender. Two bars are shown once the file is brought into Blender. The teal color is for audio, the blue is the video. Similarly, audio files can be added the same way, they just won't contain a video part.
Note: Frame rate between the iPhone and program may be slightly off. This is a problem for another discussion, but the stuff might not be in sync. For my purpose, I keep it simple, but the video setup and production may need polishing to be... perfect. If you run into issue, on the bottom of the program there is a menu that has No Sync by default. You can change this to AV-sync and it may fix some problems.
The video and audio tracks can be select by right clicking them. Left clicking the area will place a green line. At the bottom of the screen are player options such as rewind, fast forward, play, and stop. You can click the play button to play the files, they start playing at the green line. Where the green line is placed and a track selected, the k key can be pressed to cut the track into two pieces. A piece you want cut out can be deleted using the delete key then selecting the option. I cut the airplane noise then added in a guitar track. To align the audio perfectly, select the track you want to move, press the g key then hold control and drag the track to the track you want to snap it to. This method allows the program to snap the track to the other track. Then left click the track you are moving to apply it before you let go of the ctrl key. Saving the File:
In another section of blender, I clicked the current type for this area button and selected Properties.
Within the Render section for Display I selected Keep UI. Within the Output section, I selected a file where to save the video. In the same section, I clicked the drop down menus and selected FFmpeg video. In the next section Encoding, I clicked the Presets and selected to h264 in MP4. At the Audio Codec part, I clicked the drop down menu to change from None to AAC. I then scrolled back up and click the Animation button within the Render section. The program will then process the video. After completing processing, I opened the video file to see how it played.
To Add Text:
I closed everything, then reopened blender. I then dragged the video file I created into the program. At the Screen Layout of Default, I changed the resolution from 50% to 100%. I then selected Screen Layout of Video Editing. On the right there is a section with the top section labeled Edit Strip. Within that section I see my Original Dimensions are 960x540 for the video. This may be because when I made the original video, I left the 50% on. At the video I pressed the F12 key that created a screenshot. At the bottom left I selected Image and saved the image.
I then opened the GIMP program and opened the screenshot image. I then added the text at the location of the screen shot I wanted the text to appear. I then clicked the eye icon on the right, next to the screenshot so that it vanished. I am left with a check board with the text. From GIMP I Exported the image.
Back in Blender I pressed escape to leave the screenshot. I then selected Add then Image, then opened the image file.
This added an image track. With the image track selected, to the right within Edit Strip, at the Blend menu, I selected Alpha Over.
Then I dragged the image track to show where I wanted it during the video. Again, audio sync still had a problem. I changed the No Sync to AV-sync and that seemed to fix the issue. I then repeated the export process to save the video as I mentioned above.
While signed into Google, I went to YouTube, and my YouTube Channel, then uploaded and set the settings for the video. Overall, this took a good part of the day.
Thank you for viewing! Questions or issues, let me know!
Have a Great day!